How to Make a Vector-Style Woman Composition
How to Make a Vector-Style Woman Composition
Vector graphics design is one of the leading styles for print magazines and in titling of movies right now. In this tutorial, we are going to cover the entire body of a woman with stock vector art by employing some of the basic tools and blending options in Adobe Photoshop. We will also need Adobe Illustrator to open the vector files and to provide a source for importing the vectors into Photoshop.
Preview
You may click the image below to see the full-scale version of what we will be creating in this tutorial.
Step 1: Separate the model’s swimwear into a new layer
To begin, import the model into Photoshop (Female Stock 26 from the Resources listing).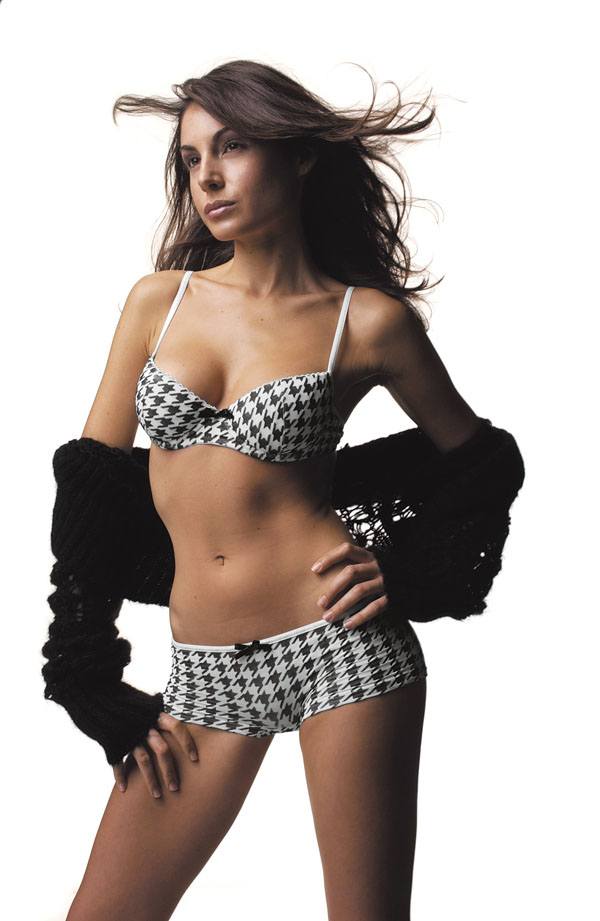
Take out the Pen Tool (P) and draw a selection around the subject’s clothes (her swimwear). When you have finished the selection, right-click inside it and choose Make Selection to convert the path you just drew into a selection.
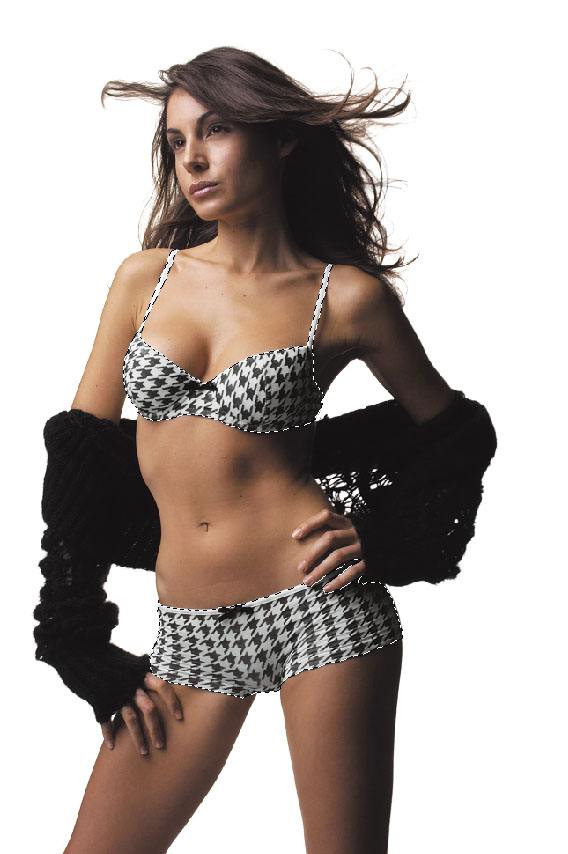
Now press Ctrl/Cmd + J to copy the subject’s swimwear (the selected area) as a new layer.
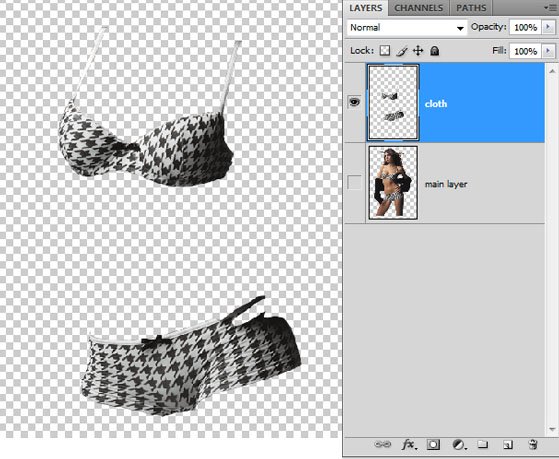
Step 2: Separate the model’s skin areas into a new layer
In the same way as Step 1, select around the skin of the model with the Pen Tool (P) and make it a new layer. Name this layer as "skin" to keep the work organized.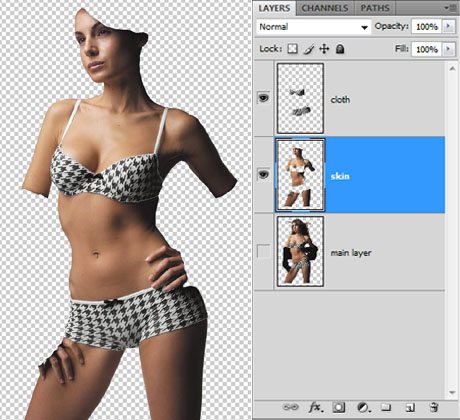
Step 3: Desaturate the skin layer
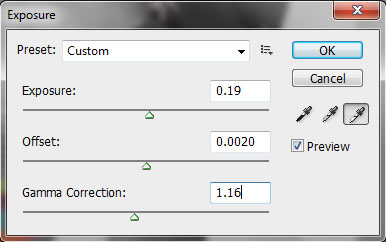
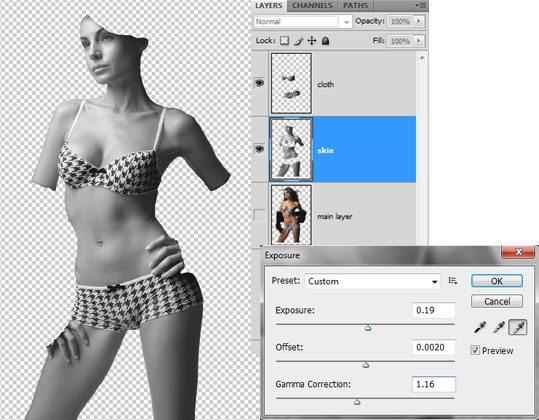
Now, having the skin layer selected, go to Image > Adjustments > Desaturate (Shift + Ctrl/Cmd + U) to desaturate the skin.Then adjust the exposure levels (Image > Adjustments > Exposure) of the skin layer. You can utilize the following option values:
- Exposure: +0.19
- Offset: +0.0020
- Gamma Correction: 1.16
Step 4: Create the coat and hair layer
Still on the skin layer, choose the Magic Wand Tool (W) from the Tools Panel, and select around the skin of our subject (as shown below).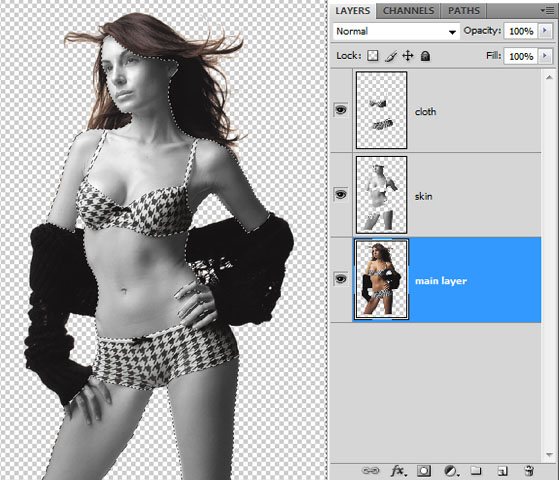
Once finished, right-click on the magic wand selection in the canvas and choose Save Selection so that Photoshop remembers this selection for later.
Now select the "main layer" and go to Select > Load Selection; choose the previously saved selection in the drop down list of the Channel option.
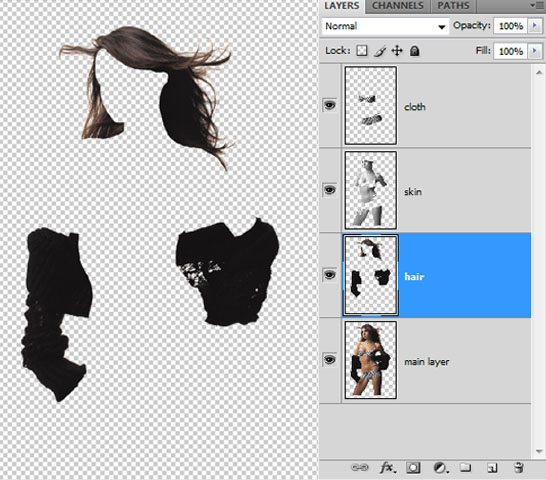
Once the selection is loaded, press Ctrl/Cmd + J to separate the hair, coat and swimwear into a new layer.
Erase the swimwear in the new layer by loading a selection around the swimwear layer (Ctrl/Cmd + click on its thumbnail in the Layers Panel), going back to the new layer, and pressing the Delete key. You might have to erase any remaining swimwear areas manually with the Eraser Tool (E). We’re removing this from the new layer since we already have it in another layer.
Step 5: Create the layer with the model’s hands
Go ahead and select the "skin" layer and make a selection around the fingers with the Pen Tool (P), covert it to a selection (right-click inside the pen’s path and choose Make Selection) and then create a new layer with only the subject’s hands on it (Ctrl/Cmd + J).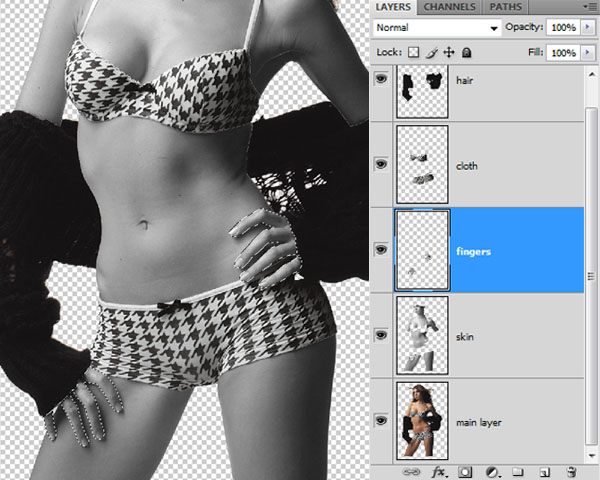
Put the "skin" and "layer 0" beneath all the layers.
Step 6: Importing vectors from illustrator to Photoshop
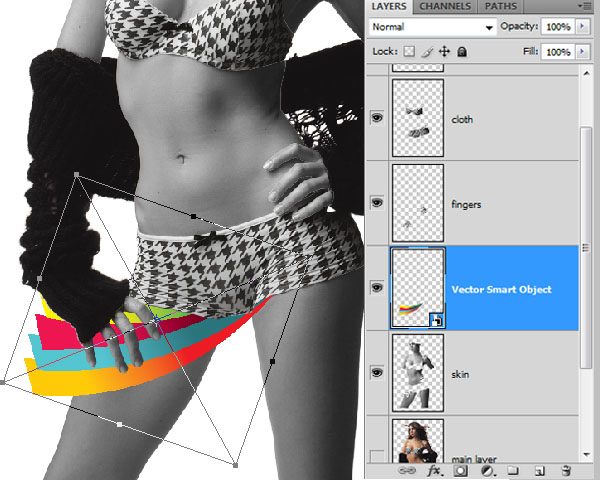
Open our first vector resource (new world vector in the Resources listing) in Adobe Illustrator and select a vector shape with the Move Tool (V). Tip: hold Shift to select multiple vector shapes in the artboard.
Once the vector is selected, just drag and drop into your work area in Photoshop.
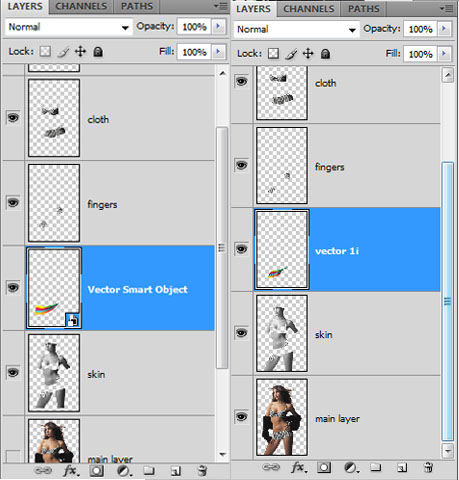
After importing the vector into Photoshop, right-click the vector layer and select Rasterize Layer.
Afterwards, use the Move Tool (V) to position the vector on the subject’s right thigh (I named this layer "vector 1i").
Step 7: Cut out excess areas of the vector shape
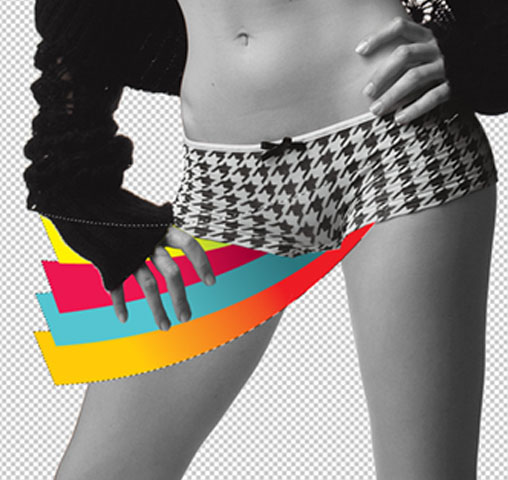
Select the shape of the vector with the Magic Wand Tool (W).Then use the same selection on the "skin" layer and press (Ctrl/Cmd + J) to cut the skin layer into the shape of vector. Name the layer "vector 1".
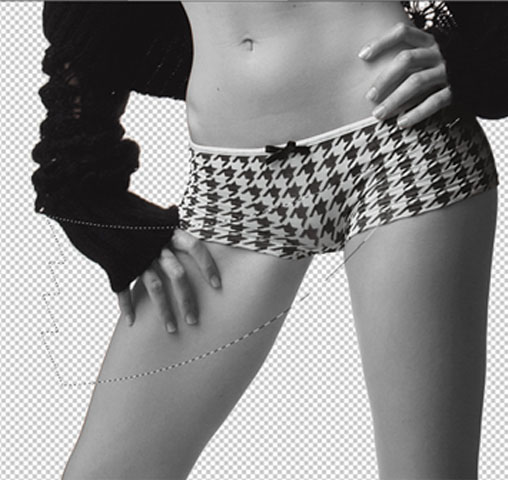
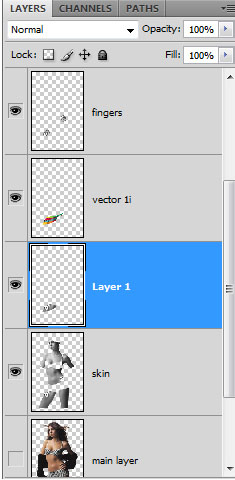
Step 8: Apply a Smart Blur on "vector 1" layer
With the "vector 1" layer selected, go to Filter > Blur > Smart Blur and adjust the Radius to 3.0 and Threshold to 25.0.
Step 9: Change the blending mode
Now select the "vector 1i" layer and change the blending mode to Overlay to let a little bit of its background show through.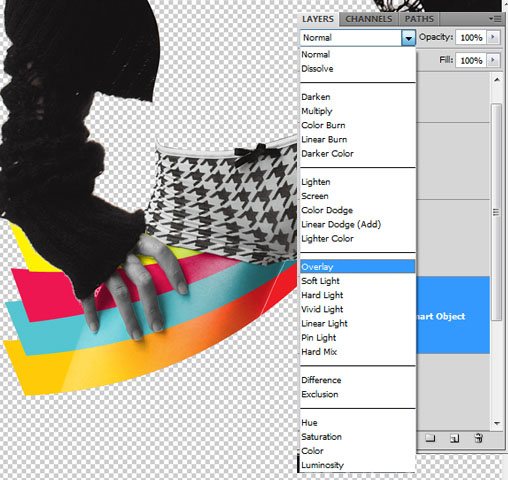
After that, select both "vector 1" and "vector 1i" layers in the Layers Panel by holding down Ctrl/Cmd while clicking on them. Once selected, right-click on one of them and choose Merge Layers.
Erase unwanted parts manually with the Eraser Tool (E).

Step 10: Choose vectors to import into the scene
Vectors must be chosen very carefully because they are central to the aesthetics and concept of the design. In the following example, I have chosen a vector that resembles water (Vector Design 3 from the Resources listing).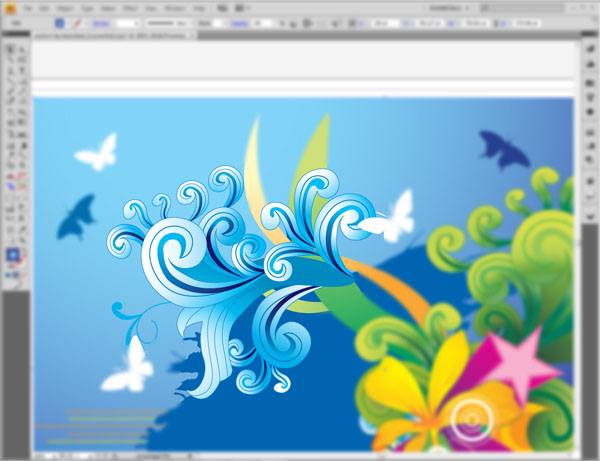
Step 11: Placing the vector
When incorporating the vectors, first open them in Illustrator, select them with the Selection Tool (V) and then import to Photoshop via drag and drop, as indicated in previous steps—this will be the general process for importing all the vectors into the piece. I started my design from abdomen.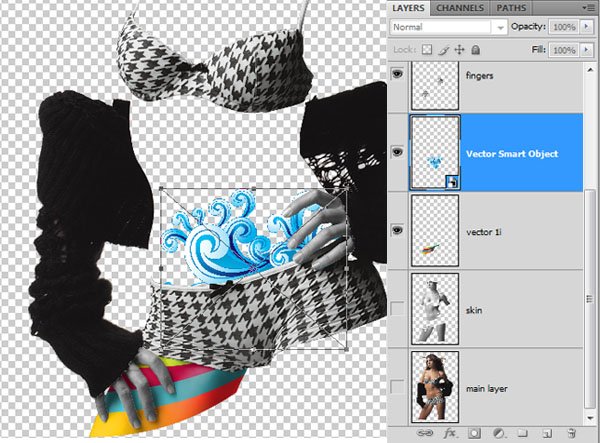
Step 12: Selecting the skin
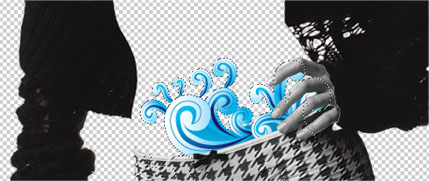
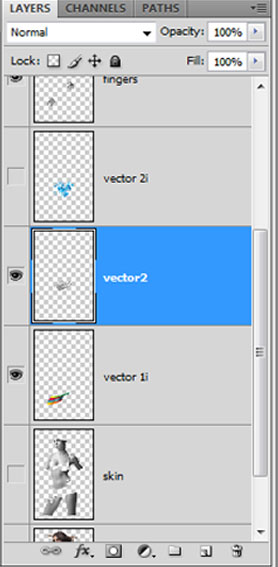
Having the vector layer active, make a selection around it with Magic Wand Tool (W).Afterwards, use the selection on the "skin" layer to cut the skin into the vector design shape. Press Ctrl/Cmd + J to make the selected skin a new layer, and name the layer "vector2".
Step13: Apply a Smart Blur on the vector layer
With the "vector2" layer selected, go to Filter > Blur > Smart Blur. Change the values of Radius to 3.0 and Threshold to about 25.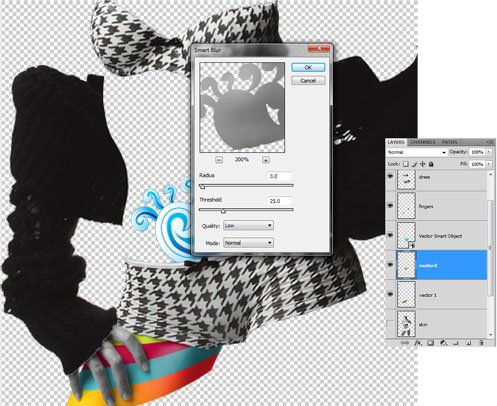
Step 14: Rasterizing imported vector layers
When the vector is imported into Photoshop, it appears as a Vector Smart Object automatically. As a Vector Smart Object, vectors cannot be edited or transformed, so right-click on this layer in the Layers Panel and pick Rasterize Layer. Name the layer "vector 2i".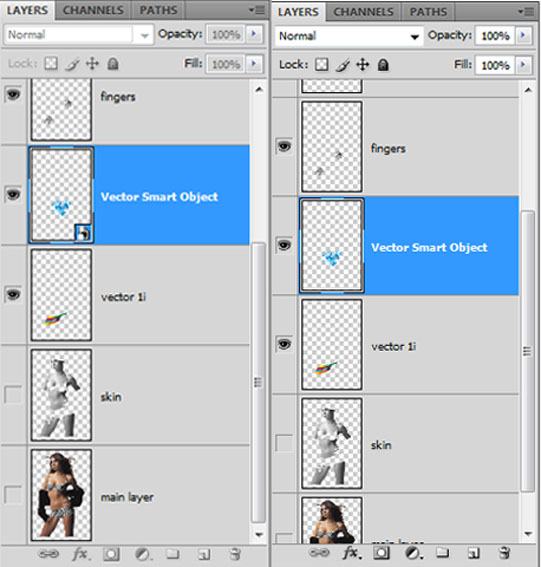

Step 15: Change the blending mode to Overlay
Select the "vector 2i" layer and change the blending mode to Overlay. Then select both the "vector2" layers, right-click on one of them and then choose Merge Layers.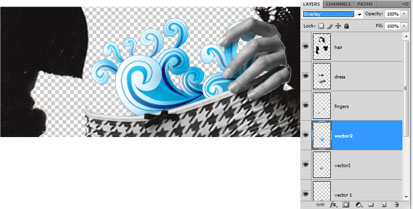
Step 16: Applying shadows on vectors
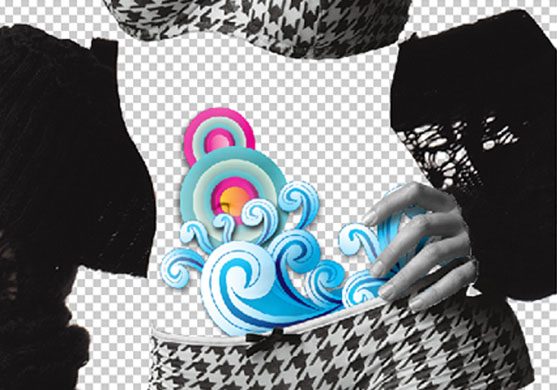
All the layers should be given a drop shadow to show that they are on top of one another.I have imported a new vector (Swirls Vector Illustrations Set from the Resources listing) in the similar way as mentioned in the above steps and placed it under the "vector2" layer.
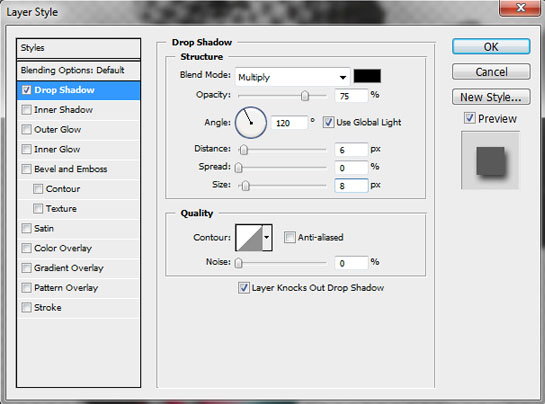
Right-click on the "vector2" layer and then select Blending Options to open up the Layer Styles dialog window. Apply a Drop Shadow layer style, setting the Distance to 6px and Size to about 8px.
Step 17: Sequence of Designing
Now it’s time to use your own creative license to arrange the rest of the vectors. Use suggested vectors from the Resources listing—or use your own vectors—to fill in the remaining spaces of our subject using the techniques we have covered in the preceding steps.
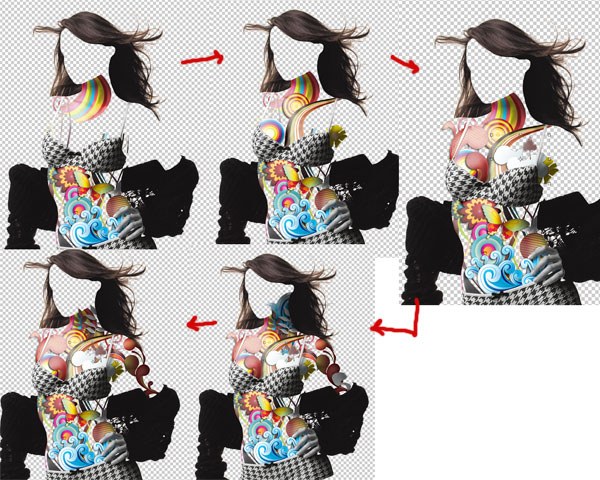
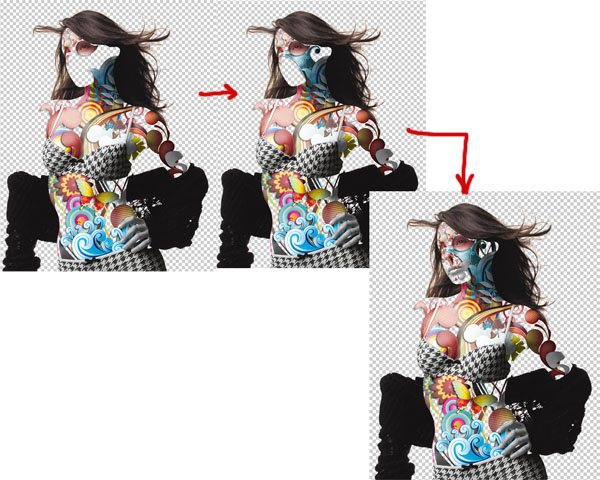

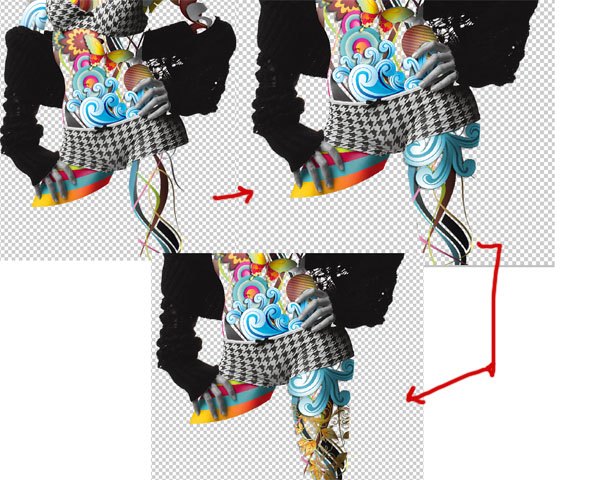
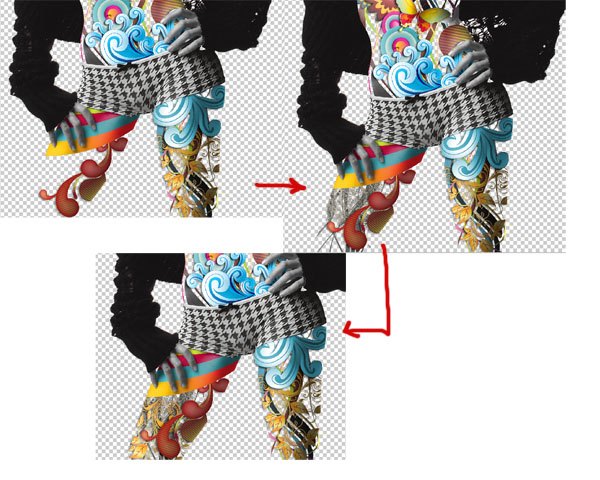
Step 18: Fill the gaps
Since there are gaps in between the vectors, the coat of the subject must be visible through them.Select a part of the coat with the Lasso Tool (L) and press Ctrl/Cmd + J to create a new layer from the chosen area.
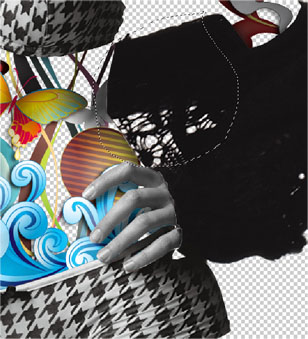
Utilize the Free Transform command (Ctrl/Cmd + T) to stretch the previously created layer to the right side of the model.
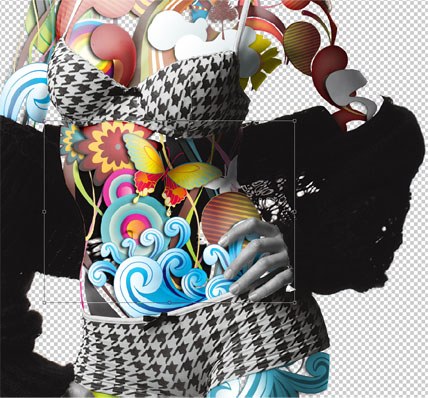
Step 19: Painting to fill the remaining gaps
Now make a new layer beneath the "coat" layer and select an area near left elbow with the Lasso Tool (L).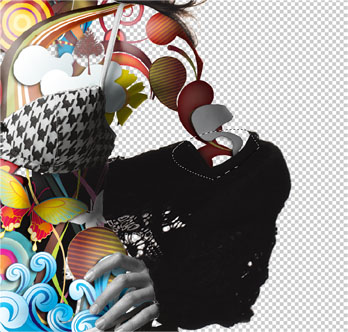
Get the Paint Bucket Tool (G) and fill the selected part with a dark grey colour (#403d3d).
Then use the Brush Tool (B) with a brush tip set to an airbrush and Flow to 50% to paint one end with a darker grey colour (#222121).
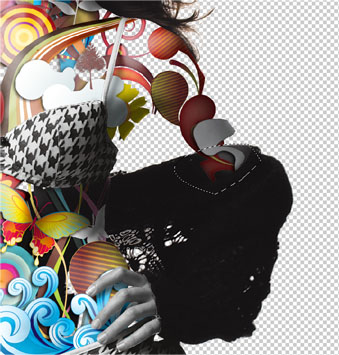
Step 20: Create the background
Though some artists like starting from the bottommost layer (the background of the composition), I prefer focusing on the subject and then designing the background of it as one of the final steps (which makes sense, since the subject is the central focus of the viewer).Pick a background that matches the design theme. I found a colourful texture set (Texture Set 38 in the Resource listing) that adds a certain depth and texture to our vector woman.
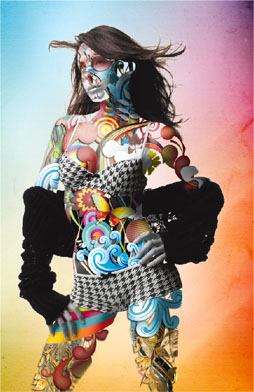
Step 21: Final details
To finish off the composition, I selected a few more vectors like sunrays, clouds and circles and placed them above the texture background layer (see the Resources listing to find suggestions of what vectors to use). I changed the blending mode of the sunrays layer to Overlay and the other vectors to Soft Light to let a bit of the texture show through them.
Tutorial Summary
In this tutorial, I have displayed a method for using stock vectors to create an interesting and popular effect that can be seen in print magazines and advertisements. We used Photoshop to compose the scene. We isolated and separated different parts of our subject into several layers to make it easier for us to work with. We used various vector files, opening them in Illustrator and then importing them into Photoshop. We covered a technique or two for retouching the spots that have gaps in them. Finally, we finished the piece with a textured background and some more vectors for details.I hope you enjoyed this tutorial. Share your thoughts and ask your questions in the comments. Don’t be shy to show us your own version by including it in the Design Instruct Flickr group pool.

Komentar
Posting Komentar